Primer thankfully dries to the touch in about an hour, making it a great first layer to prime your project. While it might seem like an extra step, primer sets a blank stage for a surface to make applying paint much more effective. However, primer takes time to dry and requires a little work to do correctly. Different types of primers act differently. Let’s look at all the factors to ensure you apply primer correctly for a fantastic finished project.
Types of Primer
Primer is a base paint without colors designed to bond to surfaces and provides a consistent appearance ready for paint.
Oil-based primers are more versatile but also more challenging to work with too. This primer can take a full day to dry completely, which definitely adds to the timeline of your project. Oil primer includes smells too but works well with wood as it offers the most protection.
Water-based primer dries in a mere one to three hours, and it’s easy to work with on most surfaces without horrible smells or VOCs.
Latex primers are also water-based and dry quickly in about one to two hours. Furthermore, there are no VOCs in latex paint. You will not get as much protection from latex paint, though.
Drywall primer is also known as PVA or polyvinyl acetate, and it’s very solid when dry, making it a great option for porous surfaces like sheetrock. It can dry quickly in as little as a half-hour to an hour but will take about a day to fully cure.
Bonding primers promote adhesion to difficult surfaces like concrete. The first coat can dry in as little as an hour and cure in about a day. This primer can come in both oil or water-based option. It’s a great option as it will bond with most products.
How to Make Primer Dry Faster
While most primers will dry in half an hour, many can take up to 24 hours to dry. Many factors can increase drying time, such as ventilation, temperature, and the surface. To improve your project’s environment, use a dehumidifier to reduce the humidity level and allow the item to cure quicker. Keep air flowing with open windows and doors and opt for a temperature of about 70 degrees.
Next, make sure to use thin layers of primer to allow it to dry smoothly and accurately. Thick layers can take much longer to dry and ruin the level of the paint job.
Surfaces
No matter what surface you use, you will need primer to dry before you can paint. Even with different thermal characteristics, primer will take the same amount of time to dry for almost any surface, give or take a few minutes.
Supplies
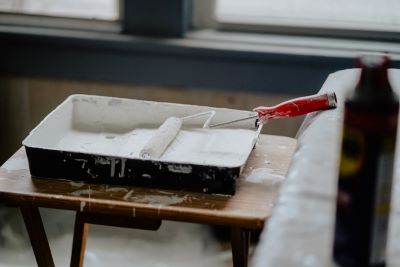
To apply primer, you will need a brush or roller, paint tray, painter’s tape, gloves, protective eye wear and clothing, drop cloths, sandpaper, paint, and the primer.
How to Apply Primer
Applying primer is a fairly simple process. Start with protective gear on you, and then prep the workspace. Use drop cloths and make sure the areas are very clean and free of dust or dirt. Use painter’s tape, if you are not very accurate at painting, on baseboards, outlets, or other areas where you want to avoid primer if working on something other than a wall.
Step 1: Now, you are ready to begin painting with the primer. Shake the primer can vigorously for a few minutes to ensure it’s fully stirred. Once you open the can, place the lid somewhere it will not make a mess as there will be paint on the inside of the lid. Now stir the primer and then pour into a paint tray. You are now ready to apply the primer to the wall or surface. Watch out for drips and missed areas and try to apply thin, even layers.
Step 2: Now, you wait. Many primers dry very quickly in as little as thirty minutes to an hour. To make sure it’s dry, you will need to touch it and ensure it’s dry to the touch, not tacky. You can let it dry a little longer to be sure it’s dry.
Step 3: If you plan to sand or need to sand to ensure the project is level, do so before applying another layer. Check your primer to see if they suggest sanding between layers.
Step 4: Apply a second layer if necessary or preferred. If you are not sanding, skip straight to the second layer and repeat these additional layers. After the additional layers are dry, you can apply the paint. For wood, you will want to allow the primer to dry for a full hour before painting.
Number of Coats
Primer is a base coat and does not require many layers as it’s simply supposed to even out the surface for painting. For very dark surfaces, you may need three coats if the layers are very thin. Otherwise, one to two-layer should be sufficient. Lighter surfaces will probably only need a single layer.
Sanding
Not all surfaces require sanding before you apply paint, so you will need to read the instructions before sanding. If you have any drips or uneven spots, do not hesitate to sand. Then make sure you clean the area thoroughly before applying paint. Never sand until the primer or paint are completely dry.
Final Thoughts
Primer sets the stage for painting and helps your finished project to turn out perfect. Moreover, it dries quickly, and you can use thin coats. Primer dries in about an hour but can take longer depending on the environment. Once the primer dries and you have applied the desired layers, you are ready to paint. Now go make your project beautiful by not skipping steps.