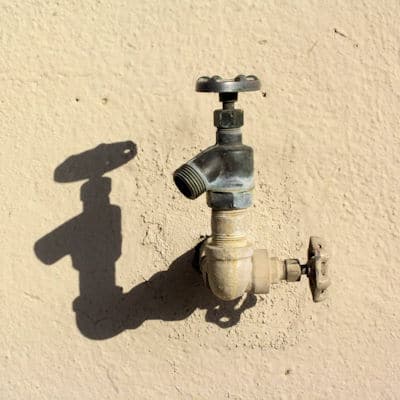
 While people rarely think about it, outdoor faucets occasionally break and need to be replaced. A leaky outdoor faucet will cost you money with every single drip and can waste thousands of gallons of water a year! Save yourself money and time by changing the faucet and help out the environment too.
Important Information About Outdoor Faucets
Most faucets for outdoor use are made of stainless steel or brass as this material can handle the elements. However, rubber washer, the part that creates a watertight seal, can deteriorate with age and cause dripping even when the valve is closed. Beyond washers, outdoor spigots include other terms you need to know.
A spigot is a term used in the plumbing world for an outdoor faucet, so you can use both words interchangeably. A hose Bibb is a spout with threads to connect a hose and is often called a sillcock and has a long pipe to stop water to prevent frost.
Spigots come in two styles, including thread size and male or female. The thread size usually comes in a half-inch or three fourth inches, and you need the correct size. With the male, the threads are on the outside, and the female, the threads are on the inside.
Parts of Outdoor Faucets
Outdoor faucets include multiple parts that you should know before trying to fix the spigot.
- Spigot – this is the main part of the faucet.
- Washer – a metal item to ensure the security of the parts.
- Rubber Washer – waterproof to ensure no leaking
- Packing Nut – keeps the parts together.
- Handle – the part you turn to operate the water.
- Philips screw – holds all the parts together.
- Threads – the part you can twist the hose onto.
Signs an Outdoor Faucets Needs Replacement

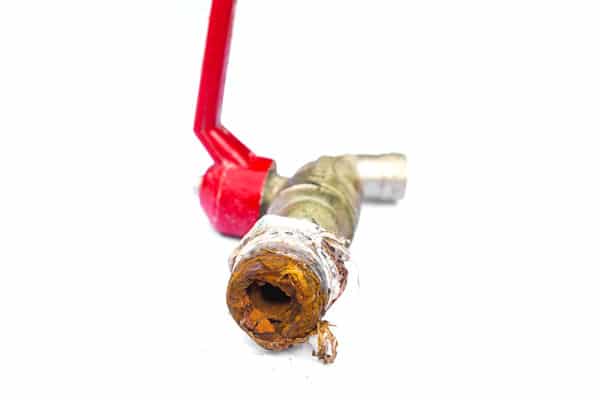
Extreme corrosion on faucet threads
A few noticeable signs indicate it’s time to replace an outdoor faucet. First, try adjusting or replacing the parts like washers, and if these steps do not work, then you will need to replace the faucet.
The first sign to check for rust or corrosion that can happen over time and cause sufficient damage to require a new spigot. Second, if the faucet is leaking, you will need to change the spigot if changing washers does not work. Finally, if mineral deposits have built upon the faucet and you cannot get it clean, you will need to replace the faucet.
All of these issues can cost you money and complications in the near future if not changed. When minerals accumulate, they can cause irreparable damage. Leaks can cost a lot of money and can leave your yard muddy. Additionally, rust and corrosion can damage the faucet and make it inoperable.
Material Needed to Replace an Outdoor Faucet
When changing out a faucet outdoors, you will need a few items. First, you will need a spigot, two pipe wrenches, a steel or wire brush, lubricant, Teflon tape, and a curb key (to turn off the outdoor water). You may also want a tape measure to check sizing. Keep a screwdriver on hand to screw in the Philips screw as well. A cloth can be helpful as well to dry up water and other debris.
Steps to Replace an Outdoor Faucet
Here are the appropriate steps to replacing an outdoor faucet correctly:
- Locate and shut off the main water valve. Usually, these are near the meter in a green box outside near the front of your house. You will need a tool and may need to shut off two different valves. If in doubt, contact the local water company. Wait a couple of moments for the water to stop after turning on the spigot and waiting for all the water to stop flowing.
- Remove the old spigot. This step will require a pipe wrench. Firmly grip the supply pipe at the hex nut with one pipe wrench and keep it steady to avoid damage. The spigot should turn counterclockwise with a second pipe wrench. As the parts may be corroded, you may need to use lubricant spray on the joint to loosen the treads for removal. This will also allow the remaining water pressure to work its way out to make it safe to work.
- Prepare the new spigot. Use a stiff wire brush to remove corrosion. Now you will want to apply plumbers or Teflon taper to the threading to ensure a water-tight seal to prevent leaking in the future.
- Install the new spigot. Insert the exposed thread with the tape starting at the base and twisting until only the tip is visible. The tape will fill in the gaps to prevent water from leaking. You may need a pipe wrench to tighten all the way. Wrap a towel around the spigot to prevent damage while inserting. Use caulk around the spigot to prevent leaking.
- Turn the water supply on. After turning it on wait a minute or two to turn on the new spigot. Check for leaks and make sure water comes out of the faucet. Now you are all done!
Helpful Tips
Call your local plumbing inspector to check for local requirements to prevent having to do the work again. Always check the sizes before starting, so you do not need to go out for more parts. Avoid using excessive force when twisting the faucet as this can cause damage. Remember, lubricant spray is your friend! Lastly, before winter, always take your garden hose off and store it for the season to avoid plumbing problems. Check the spigot once or twice a year to check for leaking and remove corrosion.
Conclusion
Changing an outdoor faucet can seem like a daunting task but trust us, it’s an easy process with the right tools. Make sure to watch a few videos to see the steps in action and if you know someone with plumbing skills, consider asking for their assistance to help with the process. You are capable of this small challenge; just remember to turn the water off and then back on after!