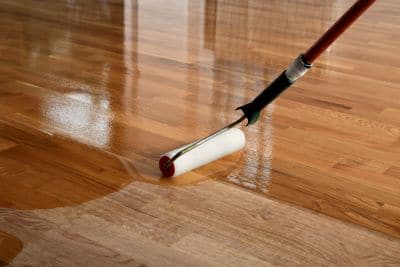
Polyurethane makes a fantastic finish, especially for wood projects. The glossy finish protects the surface and helps it to last longer from scratches, water damage, and anything else. Too many coats can cause the surface to be uneven and not look as nice, but the right amount of coats will give you a gorgeous professional finish.
Let’s look at the whole process of applying polyurethane and all the aspects of getting the finish you desire. Overall, most projects require two to three layers of polyurethane, depending on the thickness and level of protection you want for the project. You do need to consider a few factors to make the right decision for your piece.
Types of Polyurethane
Oil-based polyurethane works for both indoor and outdoor projects and is extremely sturdy as well as versatile. However, it has a very strong and toxic smell that’s not great for the environment. Also, when dry, oil-based polyurethane has a light yellow tinge instead of a clear finish. Finally, oil-based takes longer to dry, a full day or even two and a month to cure.
Water-based polyurethane does not work outside well and is not as sturdy. Although, it’s more environmentally friendly and does not have toxic VOCs or smells. While it dries quickly, it still takes a month to cure, but you can apply more layers much sooner. It can dry in as little as six hours.
No matter which you pick, make sure to check the project is completely dry and not tacky before sanding. If in doubt, then wait a little longer. No matter what you do, the project will need a full month to cure fully, although it may feel done in about two weeks. For floors, you can start using them at the two-week mark but avoid shoes if possible.
Length of Time Between Coats
The first coat takes less time to dry as you need to mix it with mineral spirits to thin it out and prime the surface before further coats. You need to wait about 24 hours before you can sand and add the next layer. Subsequent coats will take a little longer to dry, from one to two days before you can sand. Overall, if you use three coats,, the entire process will take at least a week to dry and a full month extra to cure.
Sanding Between Coats
Sanding between coats may take a lot of work, but the effort makes the project more even and beautiful. However, sanding does not make the polyurethane layers adhere better because they will already adhere; it’s about making sure the layers are free of debris and level. You even need to sand the wood before applying the polyurethane as wood tends to be bumpy and hard.
Between every layer, you need to clean all the dust you just created from sanding. Use a vacuum if possible and follow up with a lint-free cloth as well for a thorough job. Any dust left on the project will show up in the finished project and may create an eyesore you will notice even if someone else will not notice.
Removing Brush Marks
If you want to avoid brush marks, consider applying polyurethane with a roller instead of with a brush. A roller allows for a more even finish, too, making it an excellent option for larger jobs. Of course, you will still need a paintbrush for corners and other smaller areas. Otherwise, you can expect to sand more to remove brush marks.
Start with fine-grit sandpaper on the brush marks and use even pressure to keep the surface level. Next, remove all the dirt with a vacuum and soft cloth to ensure the area is completely clean. Now you can add the next layer of polyurethane. Try to avoid extra strokes to get fewer strokes and then wait for the polyurethane to dry before sanding again.
Repeat the process for each layer except for the last layer. Hopefully, the last layer will not have brush marks, but if it does, then sand as before and follow up with a wax to finish the surface and revive the gorgeous glossy luster you desire. The wax can help further finish and protect the project, but you will need to reapply every six months to a year. Wait at least two days before applying wax or polish to allow the polyurethane to dry fully.
Environment
If you want your layers to dry on time in about 24 hours, it’s best to keep the room temperature between 70 and 77 degrees. Also, you want the humidity level at or below 50 degrees. You can use a dehumidifier to reduce the humidity in the room you are painting in if necessary. Furthermore, allow for proper ventilation too for faster drying and improve air quality while working.
Dealing with Bubbles
Bubbles can be an eyesore and annoying as you put so much work and effort into the project. Once they are there, they are not leaving unless you sand them out. Stir the polyurethane instead of shaking it to prevent bubbles from forming in the first place. This is one of the reasons you need to sand. Also, you can use a razor to remove bubbles as well, but you will need to practice before using this option as it’s not the easiest option. No matter which method you use, remember to clean the area thoroughly to prevent the debris from sticking to the project.
Final Thoughts
Most projects require two to three layers of polyurethane, although you can use four if you like without ruining the finish. Follow the steps above to ensure you have a level finished project free of brush strokes and bubbles. Remember to sand and clean between layers for the best finish. Lastly, remember you can use a roller to get an even finish and reduce your work too.